How to replace kote palms
Here's a brief, but I hope helpful, post on how to replace your worn-out kote palms. Click on each picture for a bigger, more detailed view.
Sometimes kote palms (called tenouchi) wear out so badly that you can't patch them any more. If the rest of the kote is not too rotted from sweat, it should be possible to remove the old palm and replace it with new leather. I won't go into which kinds of leather here, but if you have questions about that, ask me in the comments.

To take off the old palm, start with the indigo-coloured beading. Use an unpicker. The end of the beading is threaded through both sides of the kote and then under itself. Remember how this goes, because you'll be doing it eventually!

You might find it easier to unlace the kote completely before you start work.

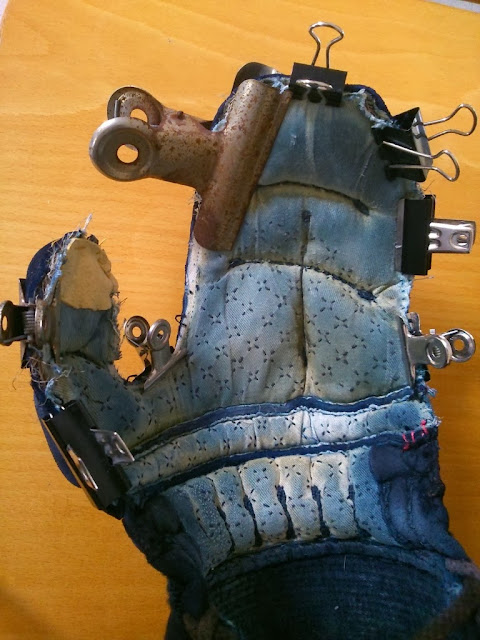
When you've removed the old palm and the beading, you'll be left with the inside of the kote, usually coloured white with some kind of indigo stitching pattern, and the outside, completely unstitched. You'll be able to see the horsehair (on good quality kote) or the kapok (on cheap kote). This is horsehair. It's all chopped up in short lengths, so it tends to fall out, so have a short stick or pencil on hand to keep poking it back in.
Hence the bulldog clips.
Notice I've patched the inside of the thumb. You'll often find wear-holes inside the kote. These are definitely worth repairing at this point.


This is the new tenouchi. This one is goatskin I believe. I've not used it before so we'll see how it wears. Kangaroo and deer skins are apparently the best for dealing with, not the wear-and-tear of Kendo usage, but the sweat-and-dry.


Here are templates for you to print out. Each page is A4, with a cm ruler for you to check the size of your print out.

Start by tacking the palm in place at the base of the palm on either side, at the tip of the fingers and thumb, and at the curve between thumb and fingers. You might have to undo and reposition these tack-points as you sew. I think this is probably the most difficult part. knowing how to stretch the palm correctly around the shape of the kote.

You can see here you have three layers you will be sewing together in your first of three passes.

Use a doubled thread for strength, and another reason I'll show later. Also, for this first pass, make the stitches on the palm-side wide, about 1cm, and on the other side short, about 3mm.

With doubled-thread, if the thread breaks, or when you get to the end, it is easy to tie off. Note how short and far apart the stitches are on this side.

Once you've gone right around with your first pass of stiches, and you think the tension of the palm is OK, you can do the second pass. This will be the first pass where you attach the new beading. I like to use a different coloured thread. Now the stitches on the palm side are short, and on the "blue" side are long. The two alternating rows of stitches should fit together, the second pass in the appropriate space left by the first pass.

The second pass, a little further along.

Once the second pass is finished it will look a bit like this.

Now the final pass is about folding the beading over to cover the first two passes, and the join. Hopefully you'll be able to do more even stitching that I have. This row should be single thread as it has more of a cosmetic role and you have less material and space to work with.

Well it started off pretty wonky but the stitches got a bit more uniform as I went along. Not an amazing job, but serviceable and strong.

A lot better looking than it was. Unfortunately the tension is not perfect and has left some loose folds, which interfere a little with grip. But it has saved a good pair of kote that were destined for the bin, and it was fun and relaxing to do.

Comments
Much obliged!